 |
| Features |
 |
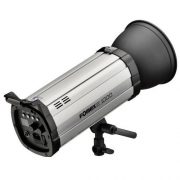
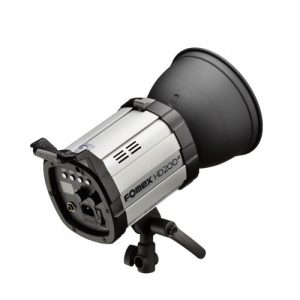
Pro-Strobe E1000
With FOMEX’s years of technical know-how and dedicated service mind throughout the whole stages from design to accomplishment, Fomex, always putting an emphasize on its products’ function as well as user’s experience, launched a high standard strobe which features a convenient digital analogue U.I, safe and easy to use ,able to produce stable and vivid light with a simple but stylish new look.
Fast response to user demand
Fomex never misses to user’s requirements.
Ease the process of making choices when it comes to choosing a studio flash.
Providing High standard strobe in every aspect for its price, features, safety, design, brand, and A/S.
Precise and consistent light quality
E series consistently maintain apparent and substantial illumination using quality standard capacitor and high-efficient flash tube. This enables users to meet their best satisfaction at taking the finest images. |
| E-Light SPEC |

 |
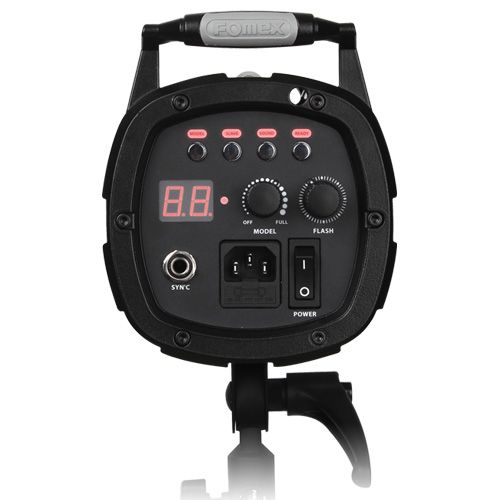
Name and function of panel1. Slave sensor: Synchronize with other lighting.
2. Sound button: Makes beeping sound when flash is charging or discharging.
3. Slave button: Controls the synchronization with other lightings.
4. Modeling button: Modeling lamp ON/OFF button.
5. O.C Signal: Over charge signal lamp, turns on when over charged.
6. FND-Digitally display power output.
O.T Display: Over temperature warming, display “EO” on the FND
7. AC Input: Socket terminal for synchro cord.
8. SYN’C: Socket terminal to connect the power cord.
9. Fuse box: Contain fuse
10. Umbrella holder
11. Ready button: To test or to manually discharge the flash.
12. Modeling lamp control dial: Controls the brightness of modeling (halogen) lamp.
13. Flash power control dial: Controls the power of the flash.
14. Power switch(ON/OFF)
|
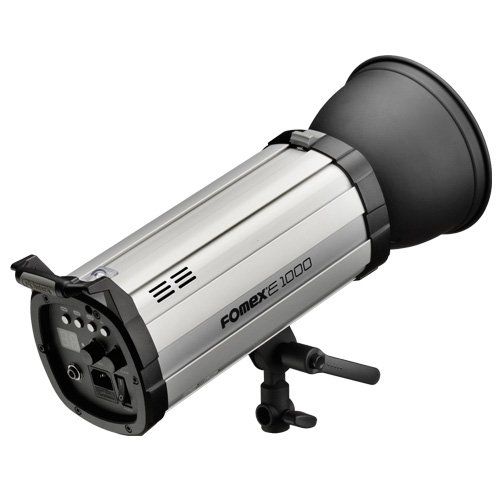
Name of each part1. Protection cap
2. Modeling(Halogen) lamp
3. Flash tube(Xenon tube)
4. Accessory disassembling and assembling locking knob
5. Slave sensor
6. Lighting grip
7. Stand stub joint fastening bolt
8. Stand stub joint part
9. Pro fastening bolt
10. Knob for fastening
11. Control panel |
|
|
| Main function of Strobe |
 |
Analogue & Digital
Even a slightest difference in flash power has a strong effect on great photograph.
The perfect combination of analogue and digital, provides the precision of power control and ability to check light data simultaneously. “Jog dial” enables users to control the light intesity easily and digital panel allows for immediate checking.
E-Series power control ranges in 6 steps from 4.0 to 10 at 1/10 an interval.
|
 |
Modeling lamp On/Off
Fomex strobes are equipped with modeling lamp (halogen).
Essential in darkness or to foresee the reflection and directionality of the light.
To completely switch off the modeling lamp press the “MODEL” button.
Also, by using the “Jog Dial” to adjust the brightness of modeling lamp is possible.
To reduce power consumption and to easily remember the last setting of the light intensity simply press the “MODEL” button after adjusting the brightness with Jog Dial.
|
 |
Light/infrared synchronize
When using a strobe, it should be connected with a camera by either sync cable or wireless devices in order to communicate signals. However, it’s impossible to connect every strobe to a camera neither by sync cable or wireless devises. Therefore a basic sync function is needed. The slave function of Fomex strobe is designed to enable users to use as many strobes as user requires as the “Photo Cell” located on top of the strobe sensitively responds even to a dim light.
“Photo Cell” on top of the strobe, triggers the flash when light is emitted onto the photo cell.
*Notice: This function may not properly work where the light is blocked.
|
 |
Compatibility with accessory
Fomex E-Series is compatible with all of FOMEX’s studio accessories.
From softbox to reflectors, a broad range of accessories are compatible with E-Series.
To attach an accessory, place the accessory aligning to the front part of strobe then simply turn it counter-clockwise until
“click” sound is heard. To detach pull back the locking-knob to release the accessory then turn clockwise.
|
|
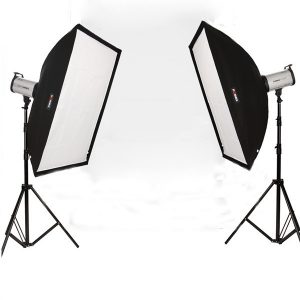
| ACCESSORIES |
 |
|
| * Handling Precaution
This handling precaution leads to use items in safety and precise purpose to avoid any danger or damage.
Please check the followings:
Whenever there are doubtful points in use, contact Fomex.
– Install in a safety place like flat ground.
– Do not install in an unstable place or on any base smaller than the item.
– Do not use with damaged power line, plug or loose electrical outlet.
– Be sure to do ground connection.
– Do not disassemble or modify the item without instructions under qualified service technician.
– Do not put metallic materials such as chopsticks, wire & awl, etc into Air vents & AV socket.
– Do not use the products near the flammable & combustible items/materials.
* Fomex is not responsible for problems made by secondary causes or external shocks due to personal neglect. |
|
|
|


Yorumlar
Henüz yorum yapılmadı.